In summary:
- Focus on paddling technique using your core muscles, not on buying expensive, lightweight gear.
- Learn how to inspect rental equipment for critical safety defects to become a confident and smart renter.
- Understand environmental factors like cold water and tides to stay safe and use nature’s power to your advantage.
- Choose the right craft for your first time—a sit-on-top kayak often provides more stability and a quicker learning curve than a paddleboard.
The image is tempting: gliding silently across a glassy lake, the sun on your back, exploring hidden coves. But for many, that dream quickly collides with the reality of price tags. Kayaks, paddleboards, and all the associated gear can seem like an insurmountable financial barrier. The common advice is to hunt for deals or buy used equipment, but this still involves a significant outlay and the risk of buying the wrong thing. It frames the problem as a purely financial one, suggesting you just need to find a cheaper way to buy in.
But what if the real entry ticket to water sports isn’t money? What if the key isn’t owning gear, but owning knowledge? This guide is built on a different philosophy, one I’ve shared with countless students: your most valuable assets on the water are a prepared body and a sharp mind. By investing a little time in understanding basic techniques, safety principles, and the environment, you can turn an affordable rental into an experience that’s richer and safer than what many gear-owners have. It’s about shifting your focus from the tech to the technique, from the price tag to the principles.
We’ll explore how to power your paddle with your body’s engine room, how to spot a dangerous piece of rental gear in seconds, and how to read the water to make your journey easier, not harder. This is your path to the water, no heavy investment required.
Contents: Your Guide to a Smarter Start in Water Sports
- Why You Don’t Need Huge Arms for Kayaking, but You Need Abs?
- How to Inspect Rental Equipment for Safety Defects?
- Sit-On-Top Kayak vs. SUP: Which Is Easier for Total Beginners?
- The “Warm Day” Mistake That Leads to Cold Water Shock
- Sequencing Your Trip: How to Use Tides to Paddle With Less Effort?
- The Water Current Trap That Even Good Swimmers Don’t See
- The Winter Chemistry Fact That Drops Your Hybrid Range by 30%
- How to Prepare Your Body for High-Altitude Activities?
Why You Don’t Need Huge Arms for Kayaking, but You Need Abs?
The biggest misconception beginners have about paddling—whether in a kayak or on a SUP—is that it’s all about arm strength. They picture themselves muscling the paddle through the water, and after 20 minutes, their shoulders are burning and they’re exhausted. This is a classic sign of poor technique. Efficient paddling isn’t about pulling with your arms; it’s about pushing and rotating with your core. Your arms and shoulders simply act as a framework, connecting the power generated from your abdominal and oblique muscles to the paddle blade.
Think of your torso as the engine. As you plant the paddle in the water on one side, you’re not pulling it back with that arm. Instead, you are using the abdominal muscles on the opposite side of your body to rotate your torso, which moves the paddle. The hand on top of the paddle shaft pushes forward. This rotational movement is incredibly powerful and sustainable. It’s the difference between sprinting for 100 yards and being able to jog for miles. Focusing on technique over tech means you can use even a basic, heavy rental paddle effectively for hours without fatigue.
Developing this core strength doesn’t require a gym membership or expensive equipment. You can build the exact muscles needed for a powerful, efficient paddle stroke right at home. The key is to mimic the rotational movement of paddling. This small investment in physical preparation pays far greater dividends than buying a carbon-fiber paddle.
Your No-Cost Core Preparation Routine for Paddling
- Russian Twists (3 sets of 15 each side): Sit on the floor, lean back slightly, and twist your torso from side to side. This directly mimics the rotational movement of paddling.
- Planks (3 sets of 30-60 seconds): This foundational exercise builds the core stability essential for maintaining balance on a kayak or SUP.
- Wood Chops with household item (8-12 reps each side): Hold a water bottle or book and move it diagonally across your body, strengthening the obliques and deltoids.
- Bird-dogs (10 reps each side): On all fours, extend an opposite arm and leg. This improves the balance and lower back strength crucial for a stable paddling posture.
- Rotating Crunches (15 each side): Lying on your back, bring an opposite knee to an opposite elbow to target the specific obliques used in paddle strokes.
By building this base, you’re not just getting fitter; you’re acquiring the “engine” that makes water sports enjoyable and sustainable, regardless of the equipment you’re using.
How to Inspect Rental Equipment for Safety Defects?
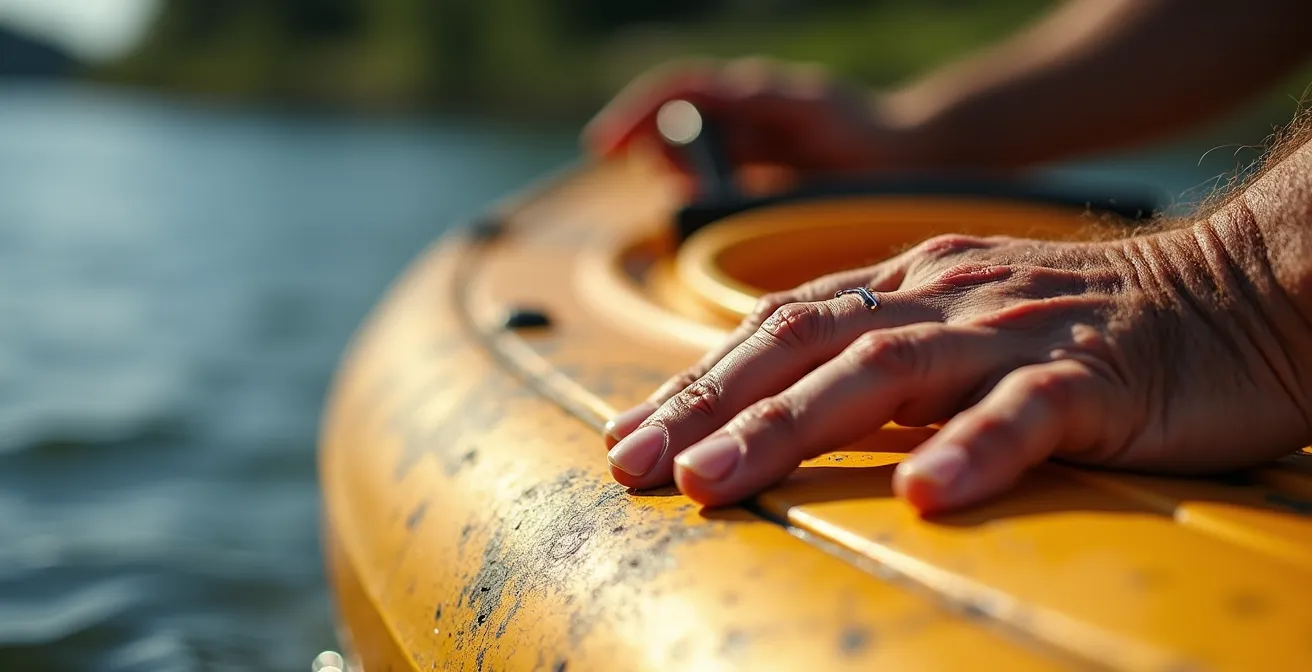
Choosing to rent is a brilliant, budget-friendly strategy. But it introduces one variable you must control: the condition of the gear. A rental shop’s priority can sometimes be turnover, not meticulous maintenance. Gaining “rental confidence” means learning to perform your own quick, effective safety check. This knowledge is your currency, ensuring your safety when you don’t own the equipment. A five-minute inspection can be the difference between a fantastic day and a disaster.
Start with the craft itself—the kayak or paddleboard. You’re looking for structural integrity. Run your hands over the hull’s surface. Minor, light surface scratches are normal wear and tear and are no cause for concern. They’re like scuffs on a shoe. What you must look for are deep gouges, visible cracks (especially around handles, seats, or fin boxes), or any areas that feel soft or flexible when you press on them. These are red flags indicating a compromised hull that could fail under stress.
Next, check the accessories. For a kayak, inspect the paddle for cracks in the shaft or a loose connection point (ferrule) where the two halves join. Wiggle it to ensure it’s solid. For a SUP, check that the fin is securely attached to the board. A loose fin will make steering nearly impossible. Finally, and most importantly, inspect the Personal Flotation Device (PFD). Check all straps and buckles. Tug on them firmly. If a clip is cracked or a strap is frayed, it is not safe. Ask for another one without hesitation. A PFD is a life-saving device, not an accessory.
This simple process turns you from a passive customer into an informed user. The following guide, based on common issues observed in rental fleets, can help you quickly distinguish between what’s acceptable and what’s a deal-breaker.
| Inspection Point | Normal Wear | Red Flag Damage |
|---|---|---|
| Hull Surface | Light surface scratches, minor scuffs | Deep gouges, cracks, soft spots |
| Paddle Shaft | Minor grip wear, light scratches | Cracks at joints, bent shaft, loose ferrule |
| PFD Buckles | Slight fading, minor salt residue | Broken clips, torn straps, missing buckles |
| SUP Fin Box | Tight fit, minor sand/debris | Loose fin, cracked box, missing screws |
Never be shy about rejecting a piece of equipment. Your safety is non-negotiable, and a reputable rental shop will always respect a customer who demonstrates good situational awareness.
Sit-On-Top Kayak vs. SUP: Which Is Easier for Total Beginners?
For your first time on the water, the choice of craft can significantly impact your experience. The two most accessible options at any rental spot are the sit-on-top (SOT) kayak and the stand-up paddleboard (SUP). While both are fantastic, they offer very different learning curves for a total beginner. Your goal is to maximize fun and confidence on a budget, and the “time-to-fun” metric is crucial here. For most beginners, the SOT kayak is the clear winner for immediate enjoyment and stability.
The primary reason is stability. SOT kayaks are typically wider (often 28-34 inches) and have a lower center of gravity because you are sitting down. This provides immense “primary stability”—the feeling of being solid and not tippy when the water is calm. Most beginners can get into a SOT kayak and feel confident paddling within 15 minutes. In contrast, a SUP requires you to find your balance while standing, which can take an hour or two of falling and getting back on before it feels natural. While falling in is part of the fun on a warm day, it can be intimidating for a first-timer.
From a budget perspective, the costs are very similar. An analysis of rental shops shows that typical rental prices are around $30-50 for a SUP for a half-day, versus $25-40 for a kayak. The small cost saving on the kayak, combined with the much higher likelihood of staying dry and comfortable, makes it the more strategic choice for a first outing. A SUP offers great versatility for things like on-water yoga or as a swim platform, but for simply getting out and exploring with confidence, the SOT kayak’s stability is unmatched for a novice.
The best approach is to start with a SOT kayak for your first one or two trips to build confidence and basic paddling skills. Once you feel comfortable on the water, you can then rent a SUP on your next adventure to try a new challenge.
The “Warm Day” Mistake That Leads to Cold Water Shock
It’s a beautiful, sunny 75°F (24°C) day. The air feels warm, so you throw on a t-shirt and shorts to go kayaking. This is one of the most common and dangerous mistakes a beginner can make. The air temperature is irrelevant; the water temperature is what matters for your safety. Falling into water that is 60°F (15°C) or colder—which is common for oceans, lakes, and rivers outside of peak summer—can trigger an involuntary gasp reflex known as cold water shock. This can cause you to inhale water and drown, long before hypothermia even begins to set in.
Understanding the body’s reaction to cold water is critical safety knowledge. Experts on cold water survival, like the Canadian Safe Boating Council, explain the 1-10-1 principle for a person who has fallen into cold water. You have 1 minute to get your breathing under control and resist the gasp reflex. You then have about 10 minutes of meaningful movement and muscle control before the cold renders your hands and limbs useless. Finally, you have about 1 hour before you lose consciousness due to hypothermia. That first minute is the most critical phase, and it has nothing to do with your ability to swim.
Dressing for the water temperature, not the air temperature, is a non-negotiable rule. This doesn’t mean you need an expensive wetsuit. You can create a budget-friendly layering system with clothes you likely already own. The key principle is to avoid cotton at all costs, as it loses all insulating properties when wet and will actively pull heat from your body. A simple, effective system includes:
- Base layer: Synthetic athletic wear (like polyester gym shirts) or merino wool. These materials wick moisture away and insulate even when damp.
- Mid layer: A fleece or polyester pullover provides excellent insulation.
- Outer shell: A simple windbreaker or rain jacket you already own will protect you from wind and spray, which dramatically accelerate heat loss.
This simple, no-cost knowledge and a smart choice of clothing provide more safety than the most expensive kayak on the market.
Sequencing Your Trip: How to Use Tides to Paddle With Less Effort?
One of the most elegant ways to apply the “knowledge as currency” principle is by learning to work with nature, not against it. For anyone paddling in coastal areas, estuaries, or tidal rivers, understanding tides is a game-changer. Fighting against a tidal current is like paddling uphill on a treadmill—it’s exhausting and demoralizing. But timing your trip to ride the current is like getting a free push for your entire journey. This is the ultimate expression of effort economy.
Tides are simply the vertical rise and fall of sea level, but this movement creates horizontal currents. An “ebb” tide is the outgoing current as the tide level drops, and a “flood” tide is the incoming current as the tide level rises. These currents can be surprisingly powerful, often moving at 1-3 knots (1-3.5 mph), which is about the average casual paddling speed. If you paddle against it, you might find yourself working hard just to stay in one place. If you paddle with it, you can double your speed with the same amount of effort.

The strategy is simple: plan to paddle away from your starting point with the outgoing ebb tide, and plan to return with the incoming flood tide. You can find free tide charts and current predictions online for your specific location from sources like NOAA in the U.S. or local harbor master websites. Look for the times of high tide and low tide. The strongest currents typically occur midway between high and low tide. A simple plan might look like this: if high tide is at 10 AM and low tide is at 4 PM, you could start your trip around 11 AM to ride the ebb current out, then start your return trip around 3 PM to catch the beginning of the flood current coming back in.
This knowledge costs nothing, but it delivers more performance and enjoyment than any piece of high-tech equipment ever could. It allows you to explore further, with less fatigue, making your rental experience far more rewarding.
The Water Current Trap That Even Good Swimmers Don’t See
While tides are predictable currents you can use to your advantage, other types of water movement can pose a hidden threat. These are the traps that can catch even strong swimmers off guard, because swimming ability becomes irrelevant when the water itself is working against you, especially when cold is a factor. One of the most misunderstood dangers is the effect of sudden cold water immersion on even the most capable person. The raw power of cold is a force that demands respect and knowledge.
The danger isn’t just about long-term hypothermia. As paddling safety expert Dr. Gordon Giesbrecht has extensively documented, the immediate incapacitation from cold is the more urgent threat. It’s a physiological trap that has little to do with your fitness level.
In water near 32F (0C), incapacitation can occur within two to ten minutes.
– Dr. Gordon Giesbrecht, Hypothermia, Frostbite, and Other Cold Injuries
This rapid loss of muscle control means that even if you survive the initial cold shock, you may quickly become unable to pull yourself back onto your kayak or SUP. This is where hidden currents, like rip currents at a beach or strong eddies in a river, become exponentially more dangerous. A current that you could normally swim against for a short time becomes an inescapable conveyor belt when your muscles stop responding due to the cold. The trap is the combination of factors: an unseen current pulling you away, and the cold water robbing you of the ability to fight back.
Before you launch, take a moment to observe the water. Look for tell-tale signs of currents like ripples moving against the wind or debris moving quickly on the surface. Ask local rental staff about known hazards. This free advice is part of the “knowledge currency” that keeps you safe, turning a potential trap into an area you simply know to avoid.
The Winter Chemistry Fact That Drops Your Hybrid Range by 30%
It might seem unrelated, but a peculiar fact from the world of electric and hybrid vehicles offers a powerful metaphor for water sports safety: in cold weather, a car battery’s chemical reactions slow down, drastically reducing its effective range, sometimes by as much as 30%. Your phone battery does the same thing, dying unexpectedly on a cold day. The lesson is simple: cold environments sap energy from systems not designed for them. The human body is no different. It is a biological battery, and cold water is an environment that drains its energy at an alarming rate.
Just as you wouldn’t start a long winter road trip in a hybrid car without accounting for the reduced range, you should never venture onto cold water without accounting for your body’s significantly reduced “performance range.” The energy you have for paddling, for staying warm, and—most critically—for self-rescue is a finite resource that the cold will deplete with frightening efficiency. The warmth of the sun can be deceiving, making you feel energetic while the water is silently leaching your core temperature.
This analogy directly connects to the “Warm Day Mistake.” Your perceived energy level in the warm air is your “dashboard range indicator” in a heated garage. It’s an optimistic, best-case scenario. The reality is that the moment you hit the cold water, your true, effective range plummets. This is why dressing for the water temperature is so critical; it’s the equivalent of insulating your body’s battery to preserve its charge for when you need it most.
This shift in mindset—from thinking about the weather to thinking about energy conservation in a harsh environment—is a hallmark of an experienced paddler. It’s knowledge that costs nothing and ensures you always have enough power in reserve to get home safely.
Key Takeaways
- Your core strength is your engine; proper technique is more important for endurance and power than the quality of your paddle.
- Becoming a smart renter by learning to inspect equipment for safety defects is a crucial, no-cost skill.
- Always dress for the water temperature, not the air temperature, to avoid the life-threatening risk of cold water shock.
How to Prepare Your Body for High-Altitude Activities?
Preparing for a high-altitude hike involves more than just having good boots. You must acclimate your body to an environment it wasn’t built for—one with less oxygen. This preparation involves hydration, pacing, and understanding the signs of altitude sickness. This serves as a perfect final analogy for getting into water sports: you are preparing your body to enter another “alien” environment. The water has its own rules, its own physics, and its own dangers, much like the thin air of a mountain peak. Success and safety depend on preparation and acclimatization, not just equipment.
Throughout this guide, we’ve treated knowledge as the most critical piece of gear. We’ve discussed how to prepare your body’s “engine” (your core), how to “acclimate” to the cold by dressing properly, and how to understand the “thin air” of powerful currents and tides. You’ve learned that your brain is your best guide and your situational awareness is your best life vest. This approach fundamentally changes your relationship with the sport. You are no longer just a consumer hoping to buy your way in; you are an active participant, an informed navigator.
This is the ultimate way to get into nautical sports without breaking the bank. You invest your time, not your money. You build confidence through competence. You can walk up to any rental location in the world, and with a few minutes of inspection and a quick check of the local tide and weather, you can have a safe, enjoyable, and affordable adventure. You have empowered yourself to be self-reliant.
Armed with this knowledge, your next step isn’t to open a shopping app. It’s to confidently walk into a local rental shop. Ask questions, inspect the gear with a critical eye, and start your real-world adventure on the water today.