In summary:
- Slash ticket costs by over 40% by understanding and leveraging the resort’s dynamic pricing model, purchasing online 7-14 days in advance.
- Ensure safety with used gear by performing a specific binding inspection for plastic fatigue and verifying indemnification status before buying.
- Prevent the most common afternoon injuries by implementing a “fatigue tapering” strategy, matching terrain difficulty to your body’s energy levels throughout the day.
- Find 50% discounts at high-end resorts by targeting specific “value windows,” such as the mid-January ‘dead week’ or early April.
The sticker shock is real. You’ve dreamed of taking the family to a world-class ski resort, picturing perfect slopes and happy kids, only to be floored by the price of four lift tickets, rentals, and lessons. The immediate advice you’ll hear is predictable: pack your own sandwiches, drive instead of fly, or choose a smaller, less-known mountain. While these tips have some merit, they miss the fundamental point. You want the premier experience—the vast terrain, reliable snow, and top-tier amenities—without the premier price tag.
The common approach is to cut corners. The insider’s approach is to understand the system. The ski industry, particularly at top resorts, doesn’t operate on fixed prices; it runs on a sophisticated model of yield management, predictable crowd flow, and calculated risk. The secret to an affordable family trip isn’t about sacrifice. It’s about mastering the operational logistics of the resort itself to unlock deep discounts and, crucially, to manage safety in a high-altitude environment.
This guide bypasses the generic advice. Instead, we will deconstruct the core cost and safety factors of a family ski vacation. We’ll explore the mechanics of ticket pricing, the financial break-even points for children’s gear, and the physiological strategies to prevent injury and acclimate to altitude. This is your playbook for skiing the best, for less, and with greater peace of mind.
To navigate this complex topic, this article breaks down the essential strategies into a clear and actionable plan. Explore the sections below to master each component of your budget-friendly, top-tier ski vacation.
Summary: A Savvy Skier’s Guide to Affordable Family Trips at Top Resorts
- Why Buying Tickets at the Window Costs 40% More?
- How to Inspect Used Skis to Ensure Bindings Are Safe?
- Seasonal Rental vs. Purchase: Where is the Break-Even Point for Kids?
- The Fatigue Mistake That Causes Most ACL Tears After 2 PM
- Sequencing Your Vacation: Why Tuesday is the Best Day to Ski?
- Sequencing Your Trip: When to Visit High-End Resorts for Half Price?
- How to Plan an Acclimatization Schedule for a Week-Long Trip?
- How to Prepare Your Body for High-Altitude Activities?
Why Buying Tickets at the Window Costs 40% More?
Walking up to the ticket window on a Saturday morning is the single most expensive decision you can make on a ski trip. That 40% premium isn’t an arbitrary penalty; it’s the cornerstone of a resort’s financial strategy known as yield management. Airlines and hotels have used this for decades, but ski resorts have perfected it. They have a perishable inventory—a lift chair that goes up empty is lost revenue forever. Their goal is to incentivize skiers to commit early, allowing the resort to forecast demand, manage staffing, and maximize revenue per skier.
The price you pay is directly tied to the certainty you provide the resort. Buying a month in advance online gives them a guaranteed sale, so they reward you with the lowest price. Buying at the window on a bluebird powder day gives them no advanced notice, so you pay the maximum rate for that high-demand spot. This dynamic pricing is visible on most resort websites, where calendar views show fluctuating prices day-by-day. Mid-week days, especially Tuesday through Thursday, consistently hit the lowest price points as they fall between the weekend rushes.
The insider’s play is to treat ticket buying like booking a flight. As a detailed analysis of ski industry yield management explains, the system is designed to reward planning. By purchasing tickets at least 7 to 14 days in advance, you move from being a price-taker to a strategic buyer, effectively letting the resort’s own model fund your discount. Ignore this system, and you’re essentially subsidizing the planners.
How to Inspect Used Skis to Ensure Bindings Are Safe?
Buying used gear for rapidly growing kids seems like a no-brainer for saving money, but it introduces a critical safety variable: the bindings. A ski binding is not just a clamp; it’s a precisely calibrated safety release mechanism designed to prevent devastating knee and leg injuries. An old, compromised, or improperly adjusted binding is a major liability. Therefore, knowing how to perform a pre-purchase inspection is non-negotiable for any budget-savvy parent.
First, ignore the skis and focus entirely on the bindings. The single most important factor is the binding’s age and indemnification status. Manufacturers publish an “indemnified list” each year of models they still support and for which ski shops are certified to perform adjustments and liability testing. If a binding is too old (generally over 3-4 years, but always check the specific model), it’s off the list, and no certified technician will touch it. Ask the seller for the binding model and year, and check it online before you even agree to meet.
This macro view of a binding’s release mechanism highlights the complex engineering involved. When you buy used, you’re trusting that these internal components are still fully functional and free from material fatigue.

Visually inspect the plastic for signs of fatigue. Look for chalky discoloration or micro-cracks, especially around the screw holes. This indicates the plastic has become brittle from UV exposure and age, making it prone to catastrophic failure. Finally, even if a binding passes your visual inspection, the purchase is not complete until a certified technician performs a torque test with your child’s actual boot. This test ensures the binding releases under the correct force, a step that cannot be skipped.
Parent’s Pre-Purchase Safety Checklist for Used Skis
- Check if bindings are less than 3-4 years old (older models may not be serviceable).
- Inspect for plastic fatigue: Look for chalky discoloration or micro-cracks around binding screws.
- Test boot fit: Ensure your child’s boot fits without forcing the heel piece to its limit.
- Verify indemnification status: Confirm the binding model is still on the manufacturer’s current service list.
- Mandatory professional test: Plan to have a certified technician perform a torque test annually before use.
Seasonal Rental vs. Purchase: Where is the Break-Even Point for Kids?
The “rent or buy” dilemma for kids’ ski gear is a classic budget trap. The answer isn’t a simple “yes” or “no”—it’s a calculation that changes dramatically with your child’s age and how many days you plan to ski per season. Making the wrong choice can mean wasting hundreds of dollars on gear that’s outgrown in months or overpaying for daily rentals when a purchase would have been cheaper. The key is to identify the financial break-even point for your specific situation.
For the youngest skiers (ages 3-6), the math is simple: always rent. Their phenomenal growth rate means they’ll likely need a new boot size and ski length every single year. A seasonal rental package, which allows you to swap sizes if needed mid-season, is almost always the most cost-effective and practical solution. The break-even point for purchasing is so high that it’s virtually unreachable for this age group.
As children enter the 7-12 age range, their growth slows, and the calculation shifts. A well-cared-for set of used skis and boots can often last two full seasons. This is where the break-even analysis becomes critical. By comparing the cost of a used package against the cost of a seasonal rental or multiple daily rentals, you can find your magic number. For many families, this is where buying becomes viable.
This break-even analysis provides a clear framework for making the right financial decision based on your child’s age and your family’s skiing frequency, as shown in this data-driven guide for family ski trips.
| Age Group | Strategy | Cost Analysis | Break-Even Point |
|---|---|---|---|
| Ages 3-6 | Seasonal Rental | Fast growth = new size yearly | Never (rent always) |
| Ages 7-12 | Buy Used & Resell | Slower growth, 2-season use | 3-4 ski days/year |
| Ages 13+ | Purchase New | Adult sizes, 4+ season use | 5+ ski days/year |
The Fatigue Mistake That Causes Most ACL Tears After 2 PM
The biggest threat to a perfect family ski week isn’t crowds or weather—it’s a preventable injury. While skiing is safer than many mainstream sports, the risk of a season-ending injury like an ACL tear is real. Crucially, this risk is not evenly distributed throughout the day. According to reports from medical experts like Midwest Orthopaedics at Rush, most injuries occur after lunch, when skiers are physically fatigued but still mentally eager to “get their money’s worth.” This is the fatigue mistake: overestimating your body’s capacity in the afternoon.
When your legs are tired, your fine muscle control deteriorates. Your reaction time slows, and your body is less able to absorb unexpected shocks or correct for small imbalances. This is when a simple catch of an edge can turn into a serious injury. The mechanics of this are well-understood. As TYROLIA Binding Research notes in their analysis of protector bindings, the most dangerous falls involve a specific type of motion.
The backward twisting fall is known to be the main cause of knee injuries, accounting for 70% of all falls.
– TYROLIA Binding Research, Head Tyrolia Protector Binding Review
This fall mechanism becomes far more likely when your quadriceps and glutes are exhausted. The solution isn’t just to “take a break.” It’s to adopt a structured energy tapering strategy for your ski day. This means front-loading your challenging terrain in the morning when your muscles are fresh and responsive. As the day progresses, you intentionally dial back the difficulty, finishing the day with easy, groomed “victory laps” on the lower mountain. This isn’t quitting early; it’s smart energy management to ensure you can ski again tomorrow.
Energy Tapering Strategy for Injury Prevention
- Before 11 AM: Tackle your most challenging desired terrain while muscles are fresh and responsive.
- 11 AM – 1 PM: Focus on moderate blue runs as initial fatigue begins to set in.
- Lunch Break: Refuel with a carbohydrate-focused meal to replenish glycogen stores.
- 1 PM – 2 PM: Restrict skiing to familiar, groomed intermediate runs only.
- After 2 PM: Switch to easy green runs for relaxed “victory laps,” focusing on form, not speed.
Sequencing Your Vacation: Why Tuesday is the Best Day to Ski?
Not all days of the week are created equal in the mountains. For the savvy family, the single best day to ski is almost always a Tuesday. This isn’t just a matter of opinion; it’s a convergence of operational realities at the resort that create a perfect storm of ideal conditions, minimal crowds, and lower prices. Understanding this rhythm allows you to sequence your trip for maximum value and enjoyment.
The weekend warriors are gone. The Saturday-to-Saturday week-long vacationers have either just arrived and are getting settled (Sunday/Monday) or are leaving. Tuesday sits in a “sweet spot” where local traffic is at its lowest and destination travelers are often taking a rest day. This translates directly to a better on-mountain experience: no lift lines, open runs, and the feeling of having the resort to yourself. For families with young children, this is invaluable. It reduces the stress of navigating crowded intersections and provides a safer, more relaxed learning environment.
Furthermore, Tuesday mornings often feature the best snow conditions of the week. The resort’s grooming teams have had Sunday and Monday nights to work their magic on the slopes after the heavy weekend traffic. This means you are often skiing on pristine, freshly laid “corduroy” groomers, which are perfect for carving and building confidence. It’s the mountain at its absolute best, without the weekend fight to get the first tracks.

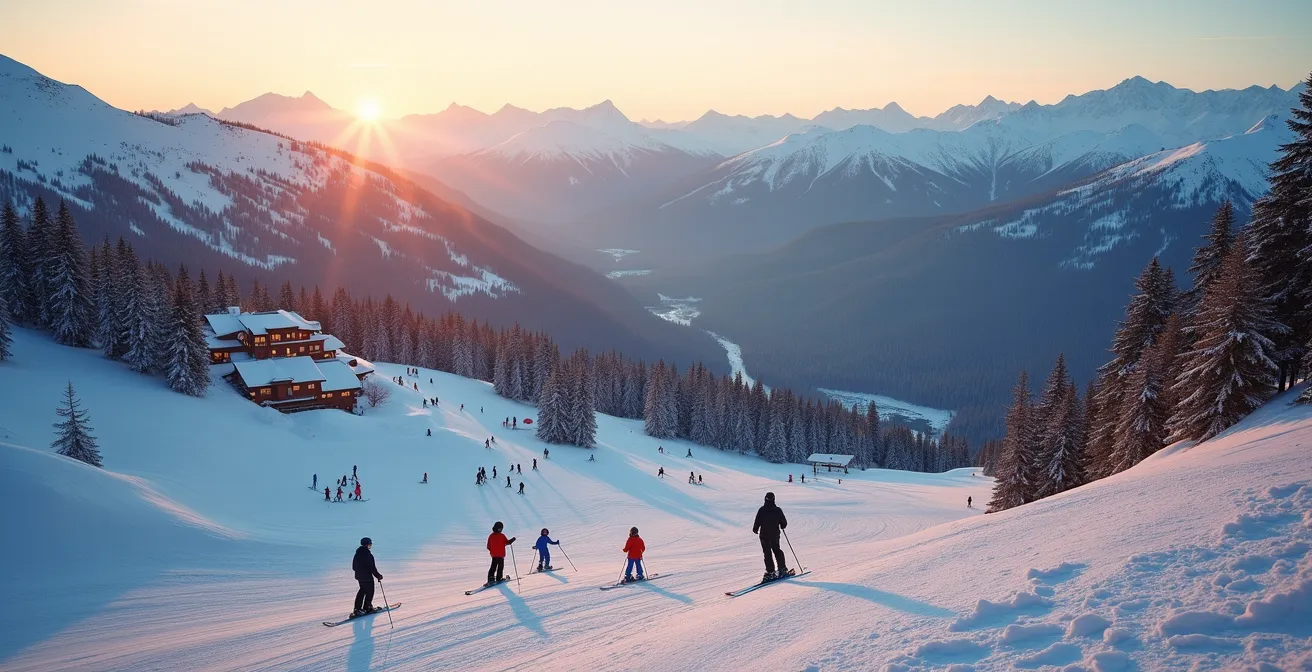
This scene of empty, perfectly groomed slopes is the reality of mid-week skiing. By planning your most intensive ski days for Tuesday and Wednesday, you get the best product the resort has to offer, and thanks to dynamic pricing, you’re likely paying less for the privilege. It’s a simple logistical choice that pays huge dividends in both quality and cost.
Sequencing Your Trip: When to Visit High-End Resorts for Half Price?
The idea of skiing a world-famous resort like Vail, Whistler, or Courchevel for half price seems impossible, but it’s entirely achievable if you master trip timing. The ski season has predictable peaks and valleys in demand, and targeting the “valleys” or value windows is the key to unlocking massive savings on everything from lodging to lift tickets. These are not secret, last-minute deals; they are recurring, predictable lulls in the season that savvy travelers exploit every year.
Holiday periods like Christmas-to-New-Year’s and President’s Day weekend are “peak” times with maximum prices and crowds. The value windows are the periods immediately surrounding them. For example, the first two weeks of December are a prime target. The resort is fully open with good early-season snow, but the holiday rush hasn’t begun. Similarly, the “dead week” in mid-January, falling after the New Year’s crowds have departed and before the Martin Luther King Jr. holiday weekend, often sees prices plummet.
Spring skiing is another goldmine for budget-conscious families. As detailed in a National Geographic guide to family ski trips, early April offers a fantastic combination of sunny weather, soft “corn” snow, and discounts that can exceed 50% on lodging. The atmosphere is more relaxed, and the longer days make it an ideal environment for kids. Don’t be afraid to think outside the box; even Christmas week can be a value window if you look to Europe, where it’s a surprisingly reasonable time to ski compared to North American resorts.
Value Windows Calendar for Premium Resorts
- First two weeks of December: The sweet spot after Thanksgiving and before the Christmas rush.
- Mid-January ‘dead week’: The quiet period after New Year’s and before the MLK holiday weekend.
- Early April: Prime spring skiing with long days, corn snow, and often 50%+ discounts on lodging.
- Non-skiing festival weeks: Check the resort’s calendar; major film or food festivals can empty the slopes.
- Christmas week in Europe: A counter-intuitive but often reasonable option compared to peak North American pricing.
How to Plan an Acclimatization Schedule for a Week-Long Trip?
Arriving at a high-altitude resort (typically above 8,000 feet / 2,500 meters) introduces a significant physiological stressor: less oxygen. Rushing into strenuous activity is a recipe for altitude sickness, which can ruin a trip with headaches, nausea, and fatigue. A successful, healthy trip requires a deliberate acclimatization discipline, not just a casual “take it easy” approach. This means having a structured plan for your first 48 hours at elevation.
The golden rule is to ease your body into the new environment. As family travel expert Taryn Newton advises, you should prioritize hydration and rest over immediate activity.
It is recommended to not ski the first day as you are acclimating to the altitude so you can avoid altitude sickness.
– Taryn Newton, Family Ski Trip Planning Guide
Your arrival day should be dedicated to settling in. This means absolutely no alcohol, which dehydrates you and exacerbates altitude symptoms. Instead, double your typical water intake. A light walk around the village is fine, but any strenuous activity is off-limits. An excellent budget and health tip is to spend the first night in a lower-altitude “gateway” town (like Denver or Salt Lake City) before ascending to the resort. This gives your body a crucial extra 12-24 hours to begin the acclimatization process at a less stressful elevation.
Your first ski day should be a half-day at most, restricted to the lower mountain terrain below the tree line. This allows you to exert yourself in a relatively oxygen-rich environment while listening to your body’s signals. By Day 3, you can begin to progress to higher lifts, but the discipline of constant hydration and listening to your body must continue throughout the week. This structured approach minimizes health risks and maximizes your energy for the peak days of your vacation.
7-Day Altitude Acclimatization Plan
- Day 1 (Arrival): No alcohol, double water intake, and engage in light walking only. Stay below 9,000 feet if possible.
- Day 2: Plan for a half-day of skiing on lower mountain terrain, staying below the tree line.
- Day 3: Progress to higher altitude lifts, but pay close attention to body signals like headache or shortness of breath.
- Days 4-5: Enjoy full ski days but maintain rigorous hydration breaks every hour.
- Days 6-7: You should be at peak performance, but continue the hydration discipline to the very end.
Key Takeaways
- The price of a ski trip is not fixed; it’s a dynamic system you can learn to navigate for significant savings.
- Proactive planning is the most powerful tool: buying tickets early, timing your visit for “value windows,” and preparing your body are more impactful than day-of penny-pinching.
- Safety and savings go hand-in-hand. A proper binding check on used gear and a smart anti-fatigue strategy on the slopes prevent the ultimate vacation-ruiner: a preventable injury.
How to Prepare Your Body for High-Altitude Activities?
The most overlooked aspect of planning a ski trip is preparing your body for the unique physical demands of the sport. Showing up “cold” without any pre-trip conditioning is a surefire way to increase your risk of injury and suffer from excessive muscle soreness that can sideline you for days. A six-week pre-ski fitness plan is the best investment you can make to ensure you’re strong, stable, and have the endurance to enjoy every day on the slopes. The focus should be on mimicking the specific stresses of skiing.
First, build your cardiovascular base. Skiing at altitude involves periods of intense effort followed by rest on the lift, which creates an oxygen debt. High-Intensity Interval Training (HIIT) is the perfect way to simulate this. For weeks one and two, focus on activities like cycling or running with short bursts of all-out effort. In weeks three and four, introduce strength training that emphasizes eccentric muscle contractions. This is the “negative” part of a movement, like slowly lowering into a squat. It specifically strengthens the muscles needed to absorb the forces of skiing downhill.
In the final two weeks, incorporate plyometrics. Exercises like box jumps or jump squats build explosive power in your legs, which is crucial for reacting to unexpected terrain and preventing the muscle imbalances that can lead to knee injuries. Throughout the entire six weeks, daily core strengthening exercises (planks, bridges) are essential for maintaining balance and control on your skis. Finally, don’t forget nutrition and hydration. Start increasing your complex carbohydrate intake a week before your trip to build glycogen stores, and begin hyper-hydrating three days before you depart to give your body a head start on acclimatization.
6-Week Pre-Ski Fitness Plan
- Weeks 1-2: Build a cardiovascular base with High-Intensity Interval Training (HIIT) to mimic oxygen debt.
- Weeks 3-4: Add eccentric muscle contractions (e.g., slow-lowering squats) to prepare for downhill forces.
- Weeks 5-6: Incorporate plyometrics (e.g., box jumps) to build explosive power for injury prevention.
- Daily: Perform core strengthening exercises like planks and bird-dogs for balance and stability.
- Pre-Trip Diet: Begin increasing complex carbohydrate and iron intake one week prior to departure.
By shifting your mindset from a passive consumer to a strategic planner, you can transform the economics and safety of your family ski trip. Begin implementing these insider strategies today to plan a vacation that delivers the world-class experience you want at a price you can afford.