You dream of exploring backcountry trails, but the fear of damaging your essential daily vehicle holds you back. The secret isn’t a massive budget for modifications. It’s about mastering a few key principles of physics and driver skill—like managing tire pressure, understanding your vehicle’s geometry, and knowing when to park and hike. This guide provides the cautious adventurer’s framework for getting out there and, more importantly, getting home safely.
The call of the wild is strong. You see photos of vehicles parked by serene alpine lakes and dusty desert sunsets, and you want that for yourself. But there’s a catch: your adventure vehicle is also your get-to-work-on-time vehicle. The common advice online often involves expensive lift kits, oversized tires, and heavy-duty bumpers—a path that can compromise the comfort, fuel economy, and reliability of a car you depend on every day. This leaves many aspiring explorers feeling stuck between a rock and a hard place, literally.
The prevailing wisdom suggests that capability is something you buy. But what if the most powerful upgrade wasn’t a part, but a principle? The truth that seasoned overlanders understand is that true capability comes from knowledge, not just hardware. It’s about developing mechanical sympathy—understanding how your vehicle behaves and what stresses it—and making smart, low-risk decisions. It’s about momentum management, not raw speed; about finessing your way through an obstacle, not forcing it.
This guide takes a different approach. We’re going to bypass the shopping lists and focus on the core skills and physical principles that will keep your daily driver safe. We will explore the non-negotiable minimums for trail readiness, the techniques for self-recovery, the critical driving adjustments for different terrains, and the overarching strategies that separate a memorable weekend from a call to a tow truck. This isn’t about turning your SUV into a monster truck; it’s about empowering you, the cautious adventurer, to confidently explore the world beyond the pavement and still make it to your Monday morning meeting.
text
To navigate this journey, we’ll cover the essential knowledge in a logical sequence, from understanding your vehicle’s physical limits to developing a safe exploration strategy. Here’s a look at the path ahead.
Summary: The Cautious Adventurer’s Off-Road Handbook
- Why 8 Inches of Clearance Is the Minimum for Moderate Trails?
- How to Use Traction Boards to Self-Recover From Mud?
- Sand vs. Mud: How Driving Inputs Must Change Completely?
- The Intake Mistake That Hydrolocks Your Engine in Seconds
- Sequencing Your PSI: When to Air Down and When to Air Up?
- The Center of Gravity Physics That Make SUVs Prone to Tipping
- Problem & Solution: Running Heavy Power Tools on a Limited Solar Setup
- How to Safely Transition From Park Trails to Backcountry Hiking?
Why 8 Inches of Clearance Is the Minimum for Moderate Trails?
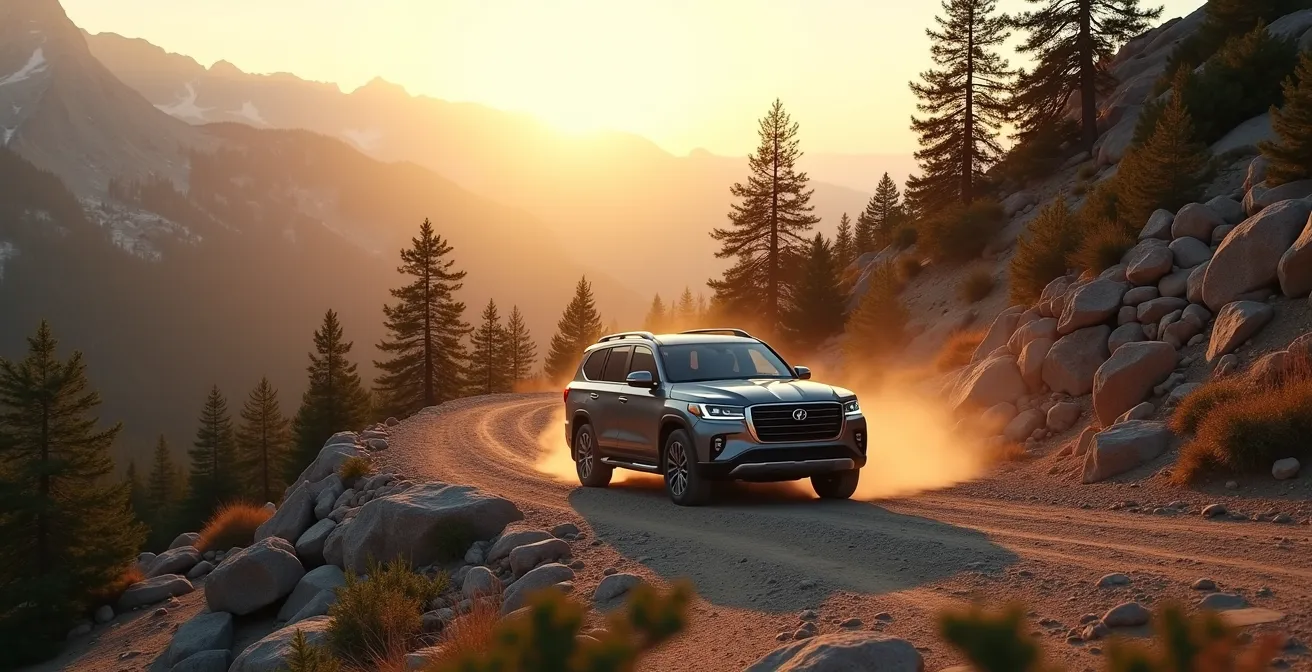
Before you even touch a dirt road, the first question you must answer is: can my vehicle physically pass over the obstacles it will encounter? This is the essence of ground clearance—the distance between the lowest point of your undercarriage and the ground. While there’s no single magic number, the off-road community generally considers 8 inches (about 20 cm) as the baseline for entry-level, moderate trails. This isn’t an arbitrary figure; it’s a practical minimum that provides a fighting chance against common obstacles like embedded rocks, deep ruts, and crowned dirt roads that can snag and damage critical components like your oil pan, transmission, or differential.
Modern crossovers and SUVs are increasingly built with this in mind. For instance, the popular 2024 Toyota RAV4 demonstrates with its class-leading ground clearance of up to 8.6 inches that manufacturers recognize this need. However, raw clearance is only part of the story. You must also consider your vehicle’s geometry: its approach, breakover, and departure angles. The approach angle determines how steep of an incline you can drive up without your front bumper hitting the slope. The departure angle is the same for the rear. The breakover angle dictates whether you can clear the peak of a sharp hill without getting high-centered, with your wheels dangling uselessly on either side. For a daily driver, these angles are often compromised by long overhangs and wheelbases designed for highway stability, making them your true limiting factors.
Understanding these limitations is the first step in dynamic risk assessment. Before approaching an obstacle, get out of the car and look. Does that rock look taller than the space under your differential? Will your front bumper plow into the far side of that ditch? Acknowledging these geometric truths doesn’t mean the adventure is over; it means you’re smart enough to find a different line or decide that this particular challenge isn’t worth the risk to your daily ride. This cautious evaluation is the hallmark of a driver who gets home without damage.
How to Use Traction Boards to Self-Recover From Mud?
Sooner or later, every off-roader faces a loss of traction. For the solo driver in a daily vehicle without a winch, this can be a trip-ending event. This is where traction boards become one of the most valuable, and relatively inexpensive, pieces of recovery gear you can own. Their function is simple: to provide a high-grip surface when your tires can find none. But their most effective use isn’t reactive; it’s proactive. It’s about deploying them with a strategy of preventive recovery.
As experienced off-roaders emphasize, the best time to use traction boards is often before you’re completely stuck. The strategy involves identifying potential trouble spots—like a short, deep mud puddle or a patch of soft sand—and using the boards to bridge the gap. By placing them at the entrance of the obstacle, you can maintain crucial momentum and drive across the hazard without ever losing traction. This approach is far more effective than trying to dig out and place boards once your vehicle’s frame is resting on the ground. When you are stuck, the process is straightforward but requires work: clear debris from in front of the spinning tires, wedge the boards as far under the tires as possible in the direction of travel, engage 4WD if you have it, and apply slow, steady throttle until the tire grips the board and pulls the vehicle forward.
To get the most out of your boards, placement is key. The goal is to create a ramp for your tire to climb onto. This often requires a small shovel to clear mud or sand from in front of and underneath the tire, allowing the board to sit at a shallow angle. Don’t just throw it on top of the mud.

As you can see in this detail, the nodules on the board are designed to bite into your tire’s tread. Ensure the board is firmly wedged against the tire so it can grab on immediately. Once you’re out, remember to retrieve your boards, which may now be buried. A brightly colored recovery rope tied to them beforehand can make this much easier. This simple tool, used with foresight, transforms a potential disaster into a minor delay.
Sand vs. Mud: How Driving Inputs Must Change Completely?
Not all low-traction surfaces are created equal. The two most common you’ll encounter, sand and mud, may look similar in their ability to halt a vehicle, but they require completely different driving approaches. Understanding this difference is critical to maintaining control and avoiding getting bogged down. The key distinction lies in how each surface reacts to tire spin and steering input. The one constant before tackling either is to lower your tire pressure, as the optimal range of 15-20 PSI, according to off-road experts, dramatically increases your tire’s footprint and flotation.
Driving on sand is a dance with momentum. The goal is to “float” on top of the surface. This requires maintaining a steady, consistent speed and making very smooth, gradual turns. Abrupt steering changes or sudden braking can cause your tires to dig in and instantly bury themselves. If you feel yourself losing momentum, resist the urge to turn the wheel sharply. Keep the wheels as straight as possible and try to gently power through. If you have to stop, do so gradually. When starting again, use the gentlest throttle input possible to avoid spinning the tires and digging holes.
Mud, on the other hand, is a battle for grip. Unlike sand, mud can offer a firmer base underneath a soft top layer. Here, controlled wheel spin can be your friend, as it helps to clear the mud from your tire’s tread lugs, allowing them to bite into firmer ground. This is where more aggressive steering inputs are often necessary to “saw” the wheel back and forth, helping the front tires find purchase on the sides of ruts. Momentum is still important, but it’s secondary to finding traction. In mud, you’re not floating; you’re digging for a handhold. This is why mud-terrain tires have large voids between their tread blocks—to eject mud effectively. An all-terrain tire on a daily driver will clog up faster, making the technique of clearing the tread with a little wheel spin even more crucial.
The Intake Mistake That Hydrolocks Your Engine in Seconds
Of all the potential mishaps off-road, few are as catastrophic and instantly destructive as hydrolocking an engine. This occurs when water enters the engine’s cylinders through the air intake. Because water is incompressible, the piston’s upward stroke comes to a violent halt, an event that can bend connecting rods, crack the engine block, and turn your reliable daily driver into a very expensive lawn ornament. The most frightening part is how quickly it can happen, often from a single, seemingly minor misjudgment during a water crossing.
The critical mistake is twofold: misjudging the water’s depth and carrying too much speed. On most stock cars, SUVs, and trucks, the engine’s air intake is located in a surprisingly vulnerable position, often just behind a headlight or low down in the front bumper for access to cool air. It is almost never as high as you think it is. The general rule of thumb for an unmodified vehicle is to never attempt a crossing deeper than the center of your wheel hubs. This provides a margin of safety against unseen dips in the creek bed. Before entering any water, you must get out and physically check the depth with a stick.
The second part of the mistake is speed. Entering the water too quickly creates a bow wave—a surge of water that washes up over the hood and directly into your air intake, even if the static water level was safe. The correct technique is to enter the water slowly, at a walking pace (3-5 mph or 5-8 km/h), to create a small, steady wave in front of your vehicle. You want to maintain this constant, slow speed all the way across. If the engine sputters or stalls, do not attempt to restart it. Doing so is what causes the mechanical damage. The only safe course of action is to get recovered out of the water and then have the engine professionally inspected and cleared. Ignoring this can be a multi-thousand-dollar mistake.
Sequencing Your PSI: When to Air Down and When to Air Up?
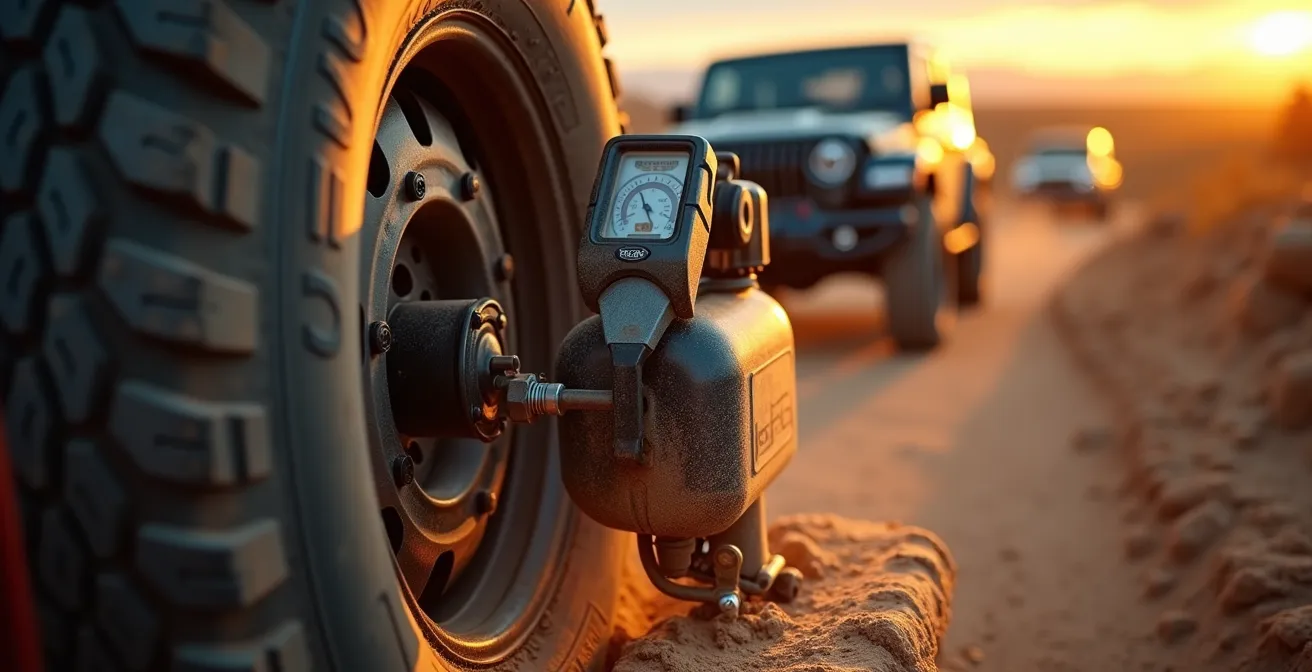
Airing down your tires is the single most effective, cheapest, and reversible “modification” you can make to your vehicle for off-road performance. Lowering the pressure (PSI) dramatically increases the tire’s contact patch, or footprint. This provides two main benefits: improved traction from having more tread on the ground, and better “flotation” on soft surfaces like sand. It also allows the tire to conform around obstacles like rocks, smoothing out the ride and reducing the risk of a puncture. However, “airing down” isn’t an on/off switch; it’s a sequenced process based on the terrain you’re facing.
The key is to adjust your PSI in stages, only going as low as necessary for the conditions. For a daily driver on standard wheels (without beadlocks, which mechanically clamp the tire to the rim), you need to be conservative to avoid the risk of rolling a tire off the wheel. A well-defined staging strategy is essential. You start with a modest reduction for easy trails and only drop lower when the terrain becomes significantly more challenging. Equally important is knowing when to air back up. Driving at low pressure on pavement is extremely dangerous; it causes the tire’s sidewalls to overheat, leading to catastrophic failure, and severely compromises braking and handling.
Having the right tools makes this process simple. A quality tire pressure gauge, a reliable portable air compressor, and a valve core removal tool (for faster deflating) are non-negotiable pieces of kit. The process becomes a routine part of any trail day: air down at the trailhead, and always, without fail, air back up to the manufacturer’s recommended on-road pressure before you hit the pavement to go home.
This hands-on management of your tire pressure is the foundation of safe off-roading. It’s a skill that directly translates to increased capability and a smoother, more controlled experience. To make this practical, here is a simple plan for adjusting your PSI.
Your PSI Staging Plan for Off-Roading
- Stage 1 (Light trails): For hard-packed dirt roads and light corrugations, reduce pressure to 20-25 PSI to smooth out the ride and improve comfort.
- Stage 2 (Moderate terrain): For rocks, deeper mud, or sand sections where more traction is needed, drop pressure to the 15-20 PSI range.
- Stage 3 (Emergency only): For severe stuck situations or very deep sand, you can go as low as 12-15 PSI, but this increases the risk of unseating the tire and should be used with extreme caution.
- Re-inflation checkpoint: Before returning to any paved surface, use your compressor to inflate all tires back to the manufacturer’s recommended PSI found on the door jamb sticker.
- Post-trail inspection: After re-inflating, check that valve stems are not damaged or leaking, and ensure the valve caps are securely tightened to keep out dirt and moisture.
The Center of Gravity Physics That Make SUVs Prone to Tipping
Modern SUVs and crossovers are taller and narrower than traditional cars, a design that inherently gives them a higher center of gravity (CoG). While this provides a commanding view of the road, it becomes a significant liability off-road. A high CoG makes a vehicle much more susceptible to tipping over, especially on side slopes (off-camber trails) or during sharp, sudden maneuvers to avoid an obstacle. Understanding and respecting this physical limitation is paramount for anyone taking a daily-driver SUV onto uneven terrain.
The problem is massively compounded by how we typically pack for an adventure. The most convenient place to store bulky gear is often the roof rack. However, every pound you add up high—rooftop tents, spare tires, fuel cans—raises the vehicle’s CoG even further, dramatically reducing its stability. A stark case study from off-road safety experts illustrates this danger: adding just 200 pounds of common gear to a roof rack can reduce a vehicle’s safe side-slope angle by up to 30%. A stock vehicle that was stable at a 35-degree angle might become dangerously unstable at just 25 degrees.
The solution is CoG discipline: a conscious and non-negotiable effort to pack heavy items as low and as centered in the vehicle as possible. Heavy recovery gear, tools, water, and dense food items should be on the floor of the cargo area, ideally between the axles. Lighter, bulkier items like sleeping bags and clothes can go higher. This simple act of weight redistribution can be the difference between a stable, confidence-inspiring vehicle and one that feels tippy and unpredictable. Before you head out, critically evaluate everything you’ve strapped to your roof and ask, “Can this go inside instead?”
To make this principle concrete, consider the following guidelines for safe load placement. This table, based on expert recommendations, shows how to properly distribute weight in your vehicle.
| Item Type | Safe Placement | Risky Placement |
|---|---|---|
| Recovery Gear | Floor behind rear axle | Roof rack or hitch carrier |
| Water/Fuel | Low, centered in vehicle | Roof-mounted containers |
| Camping Gear | Distributed evenly inside | All stacked on roof |
| Spare Tire | Factory position or inside | Roof-mounted carrier |
Problem & Solution: Running Heavy Power Tools on a Limited Solar Setup
When you’re far from the nearest town, being self-sufficient is key. This often leads to the dream of running power tools for trailside repairs or creature comforts at camp. However, for a daily driver without a complex, permanently installed dual-battery and high-wattage inverter system, this dream can quickly turn into a dead starter battery. Heavy AC power tools like grinders or saws draw a massive amount of power, far more than a simple cigarette lighter inverter or a small solar setup can provide. Forcing the issue is a recipe for drained batteries and blown fuses.
The solution isn’t to build a more complex system; it’s to adapt your toolkit to the power you have available. The overland guide’s approach is to prioritize a robust 12-volt native ecosystem. Instead of packing a 1000-watt AC tool, you invest in high-quality 12V equipment. A powerful 12V air compressor is essential for airing tires back up. A comprehensive tire plug kit negates the need for complex tire-changing equipment in most puncture situations. Bright, efficient 12V or battery-powered LED lights provide ample illumination for nighttime repairs without draining your car’s battery.
For small to medium power needs—charging phones, cameras, or even a laptop—a modern portable power station is a game-changer. These lithium-based units can be charged while you drive and then provide clean, silent power at camp, completely isolating your vehicle’s critical starter battery. When you do need to use a high-draw 12V accessory like an air compressor for an extended period, it’s wise to run the engine. This allows the alternator to carry the load and prevents you from draining the battery you need to get home. It’s about working with your vehicle’s system, not against it.
Plan d’action : The Smart 12V Toolkit for Trail Repairs
- Prioritize 12V tools: Invest first in a quality tire plug kit and a reliable 12V air compressor. These solve the most common trail issues without massive power draws.
- Understand inverter limits: Recognize that a simple 300W inverter plugged into your cigarette lighter will not power a 1000W angle grinder. Know the wattage of your tools and your inverter.
- Invest in a portable power station: For needs beyond basic charging, a modern lithium power station (500-1000W) provides silent, dedicated power for devices without touching your vehicle’s wiring.
- Protect your starter battery: When using accessories like an air compressor for more than a few minutes, run your vehicle’s engine every 20-30 minutes to let the alternator replenish the battery.
- Plan your power usage: The most efficient approach is to charge all your devices (power station, phones, etc.) while the engine is running and you are driving. Use stored battery power only when stopped.
Key Takeaways
- Off-road capability is more about driver skill, risk assessment, and understanding physics than it is about expensive modifications.
- Properly managing tire pressure by airing down is the single most effective, inexpensive way to improve your vehicle’s performance and safety on the trail.
- Respecting your vehicle’s inherent limits, especially its center of gravity and geometric angles, is the key to preventing rollovers and undercarriage damage.
How to Safely Transition From Park Trails to Backcountry Hiking?
As your confidence grows, you’ll naturally want to push deeper into the backcountry. This is where the most critical strategic shift must occur. The goal is not to conquer every obstacle with your vehicle, but to use your vehicle as a tool to access more remote adventures. This is the “Vehicle as Basecamp” strategy, a mindset that prioritizes exploration on foot over pushing your daily driver to its breaking point. It’s the safest way to transition from established park trails to true backcountry exploration.
The approach is simple: drive the trail only as far as it is comfortably within your vehicle’s and your own skill’s limits. When the trail becomes too difficult, too narrow, or too risky, you find a safe, stable spot to park. This is now your basecamp. From here, the real adventure begins on foot. This strategy maximizes the area you can explore while minimizing the risk of vehicle damage, which is paramount when you need that car for your commute. It is a humble admission that your feet are often more capable than your four-tires, and there is no shame in that.
Case Study: The Vehicle as Basecamp Strategy
Experienced overlanders and guides consistently recommend treating your daily driver as a mobile backcountry basecamp. This philosophy involves driving to a secure parking point just before the trail difficulty exceeds your vehicle’s stock capability. You then proceed on foot, using the vehicle as a safe haven. Essential preparations for this basecamp include leaving extra water, non-perishable food, warm clothing, and a fully charged backup communication device locked safely inside. This approach allows you to experience deep backcountry environments while dramatically reducing the risk of vehicle damage or a stranded situation, ensuring you and your ride make it home.
For this strategy to be safe, your vehicle must be properly equipped to serve as a lifeline. This doesn’t mean a rooftop tent and a built-in kitchen. It means having the “10 Essentials” of backcountry survival readily available, with an emphasis on self-sufficiency. Your car should contain everything you need to spend an unplanned night out, whether you are in the car or hiking away from it. This includes navigation tools that work offline, extra food and water, a comprehensive first-aid kit, and a reliable method of communication, like a satellite messenger, for when cell service inevitably disappears. This turns your car from just a mode of transport into a robust safety net.
Your adventure begins not with a purchase, but with preparation. Start by identifying a local, easy-rated forest service road or county trail. Go with another vehicle if you can. Practice these fundamental skills—airing down, reading the terrain, and knowing when to stop. The wilderness is waiting, and with a cautious and knowledgeable approach, your daily driver is the perfect key to unlock it.