Most self-builders evaluate a plot based on what they can see, but the most expensive problems are always buried underground.
- Expansive clay soil or a high water table can unexpectedly add tens of thousands of dollars to foundation and drainage costs.
- Plot characteristics like slope and location (urban vs. rural) have a direct, calculable impact on development feasibility and budget.
Recommendation: Before committing, conduct your own preliminary “landscape forensics” to identify red flags, transforming you from a hopeful buyer into an informed investor.
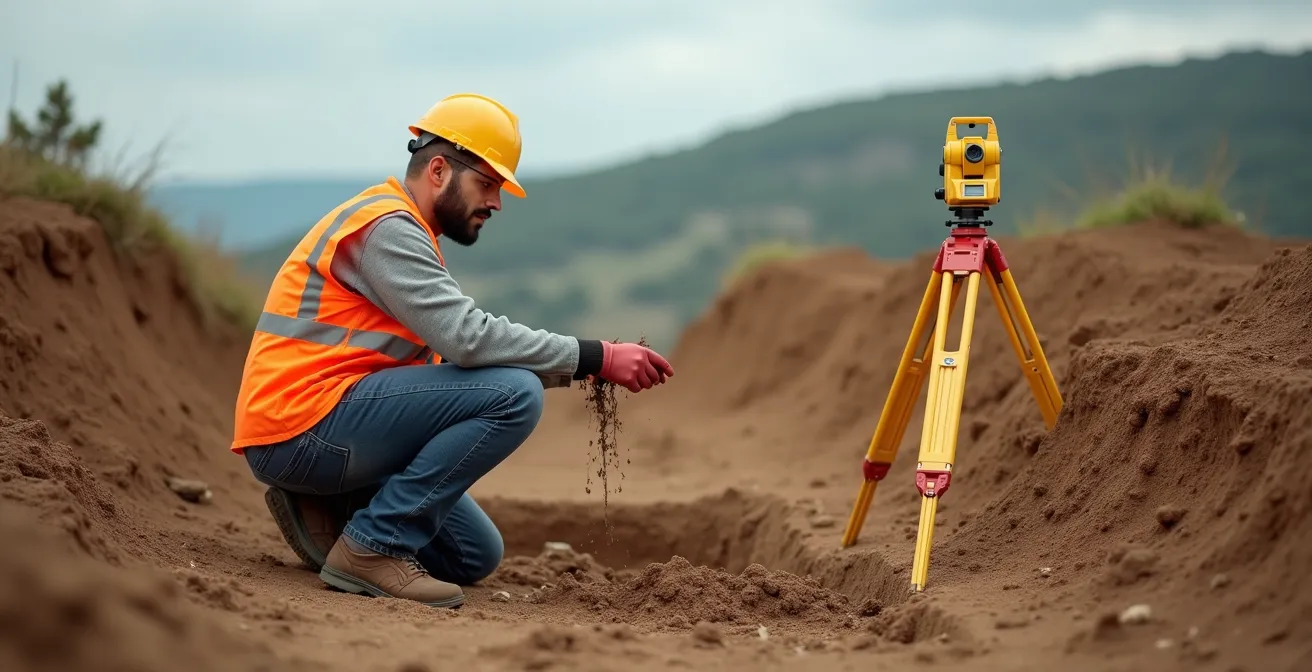
For a self-builder, finding the perfect plot of land feels like the first, most triumphant step toward a dream home. You see the view, the space, the future. However, as a land surveyor, I see a different story—one written in the soil, the slope, and the water hidden beneath the surface. Too often, buyers are seduced by the surface appeal and overlook the plot’s “geotechnical DNA,” the invisible framework that dictates a project’s feasibility, timeline, and, most critically, its final cost. The common advice is to “get a soil test,” but this happens late in the process after you’re already financially or emotionally invested.
The real power lies in learning to read the land yourself. It’s about conducting preliminary landscape forensics, a skill that elevates you from a simple buyer to a savvy investigator. This isn’t about replacing a professional geotechnical engineer but about knowing which plots to pursue and which to walk away from before you spend a single dollar on expert reports. The clues are there if you know what to look for: the type of vegetation, the subtle dips in the terrain, the behavior of neighboring properties. These are the whispers of potential structural liabilities.
This guide departs from generic checklists. Instead, it equips you with an investigative mindset. We will decode the subsurface narrative, exploring the critical geotechnical factors that are often missed during an initial walkthrough. By understanding the ‘why’ behind these issues, you can accurately assess a plot’s true potential and protect your dream home from being built on a costly, unstable foundation.
In this analysis, we will deconstruct the most critical geotechnical challenges you might face. The following sections provide a detailed roadmap for your initial site investigation, covering everything from soil composition to zoning complexities, ensuring you can evaluate any potential building plot with a professional’s eye.
Summary: A Land Surveyor’s Investigative Field Guide
- Why Clay Soil Can Add $20,000 to Your Foundation Costs?
- How to Determine if a Sloped Plot Is Buildable Within Budget?
- Urban Infill vs. Rural Greenfield: Which Is Cheaper to Develop?
- The Water Table Trap That Floods Basements Every Spring
- Sequencing Your Site Plan: Where to Place the House for Passive Solar?
- Why You Can’t Build Within 10 Feet of Your Property Line?
- Vertical Wind Turbines vs. Roof Solar: Which Works in Urban Settings?
- How to Legally Navigate Zoning Laws for Your Home Extension Project?
Why Clay Soil Can Add $20,000 to Your Foundation Costs?
Of all the hidden geotechnical issues, the presence of expansive clay soil is the most common and financially devastating for a self-builder. Unlike stable, granular soils that drain well, clay soil acts like a sponge. It swells dramatically when it absorbs water and shrinks just as significantly as it dries. This constant cycle of expansion and contraction exerts immense pressure on a foundation, leading to heaving, cracking, and eventual structural failure. What appears to be a perfectly flat, stable plot on the surface can conceal a major structural liability underground, capable of compromising your entire project.
Ignoring this single factor can have catastrophic budget implications. A standard foundation on stable ground may be straightforward, but building on high-plasticity clay requires specialized and costly engineering solutions. These can range from reinforced slab-on-grade foundations to deep-drilled piers that bypass the unstable clay layer entirely to rest on a more stable stratum. The cost difference is stark; a standard concrete slab might be one price, but adapting for clay can easily double the expense. For a typical 2,000-square-foot home, costs can escalate rapidly, with analysis showing a standard foundation cost can jump from a manageable sum to upwards of $12,000 to $28,000 for a concrete slab foundation designed to handle these conditions.
The key is to identify this risk early. You don’t need a lab initially; you can perform a simple field test to understand the soil’s basic composition. This preliminary investigation gives you the data needed to ask informed questions and decide if a full geotechnical report is a worthwhile investment.
Your Action Plan: The DIY Soil Ribbon Test
- Initial Sample: Take a handful of soil from 6-12 inches below the surface to get past the topsoil.
- Achieve Consistency: Add water gradually until the soil reaches a malleable, putty-like consistency.
- Form a Cylinder: Roll the moistened soil between your palms to form a uniform cylinder.
- Test the Ribbon: Flatten the cylinder and attempt to form a ribbon by squeezing it between your thumb and forefinger.
- Analyze the Result: If the ribbon extends beyond 2.5 inches without breaking, you have high clay content that demands special foundation consideration.
How to Determine if a Sloped Plot Is Buildable Within Budget?
A sloped plot often offers dramatic views and unique architectural possibilities, but it presents a complex geotechnical puzzle. The primary question is not simply “can I build here?” but “can I build here within a sane budget?” The steepness of the grade directly correlates with the cost and complexity of your foundation and site work. A gentle slope might only require minimal grading, whereas a steep slope necessitates extensive excavation, retaining walls, and specialized foundation designs like stepped or pier-and-beam systems. These measures are not optional; they are essential to ensure long-term slope stability and prevent soil erosion or, in the worst case, landslides.
The analysis of a slope’s buildability goes beyond a simple visual assessment. A topographical survey is the professional tool for this, but for your initial investigation, you can use clues from the landscape. Look for signs of “soil creep”—curved tree trunks, tilted fence posts, or small terraced ripples in the hillside. These indicate slow, persistent soil movement that could pose a threat to a future structure. The composition of the soil on the slope is also critical; granular soils are more prone to erosion, while rocky ledges can make excavation prohibitively expensive.
This image provides a clear visual of how professionals analyze terrain. The contour lines represent changes in elevation, which are fundamental to planning excavation, drainage, and foundation placement.
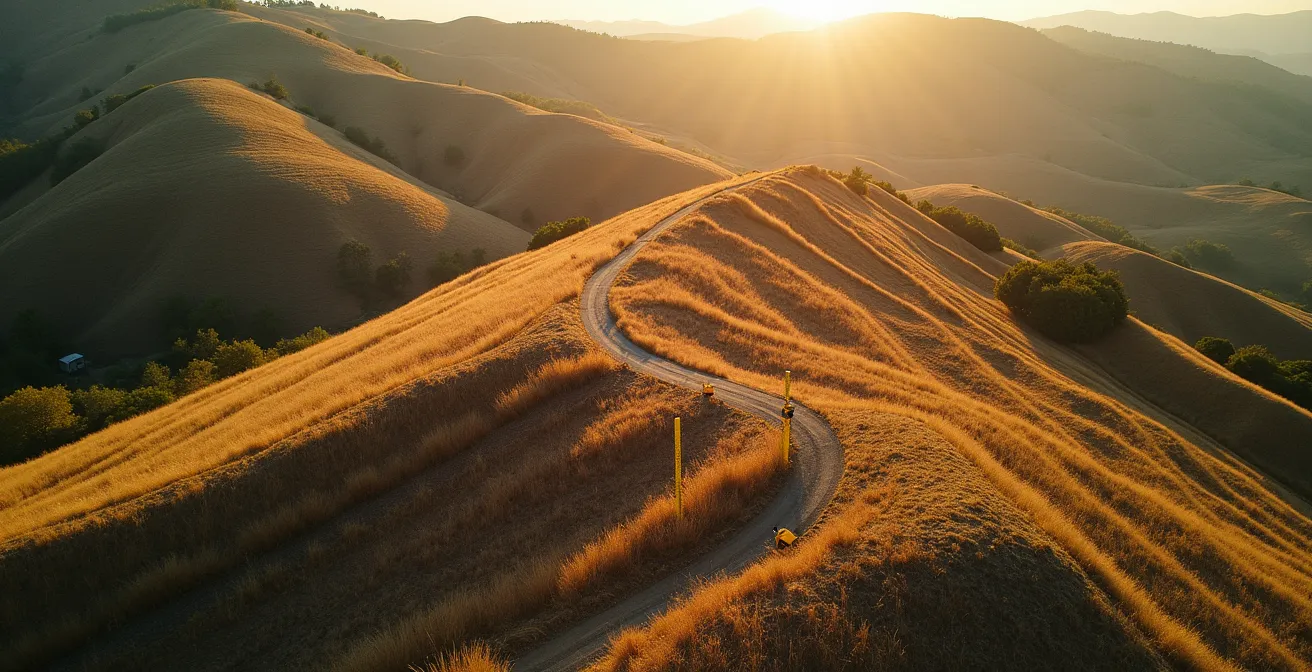
As you can see, the closer the contour lines, the steeper the slope. A builder must perform a careful cost-benefit geometrics analysis: are the aesthetic benefits of the slope worth the exponential increase in site development costs? For a self-builder, a plot with more than a 15% grade should be considered a significant financial red flag requiring immediate professional consultation. It’s a classic case where the “discounted” price of the land is quickly consumed by exorbitant foundation costs.
Urban Infill vs. Rural Greenfield: Which Is Cheaper to Develop?
The location of your plot—be it a vacant lot in a developed area (urban infill) or a pristine parcel in the countryside (rural greenfield)—presents two vastly different sets of geotechnical challenges. It’s a common misconception that an urban plot with existing utility access is automatically cheaper to develop. While you may save on running new power and water lines, the subsurface narrative of an urban lot is often far more complex and fraught with expensive surprises. These sites can hide a legacy of previous construction, including buried foundations, old utility lines, and potential soil contamination from past industrial use, all of which require costly investigation and remediation.
Conversely, a rural greenfield plot appears to be a clean slate, but its geotechnical DNA holds different risks. These sites are more likely to have issues with high water tables, uncharted agricultural drainage systems, or unexpected rock ledges just below the surface. Furthermore, the lack of existing infrastructure means you bear the full cost of installing a well for water and a septic system for waste, which can easily run into the tens of thousands of dollars depending on soil percolation rates.
The decision between urban and rural is not just about lifestyle; it’s a strategic choice with significant financial implications rooted in geotechnical realities. The following table breaks down the typical hidden costs associated with each type of development, providing a clearer picture of the true financial landscape.
This comparative data, based on a thorough analysis of development costs, highlights the distinct financial risks of each scenario.
| Factor | Urban Infill | Rural Greenfield |
|---|---|---|
| Initial Site Assessment | $5,000-$10,000 (contamination testing required) | $3,000-$7,000 (standard soil testing) |
| Hidden Risks | Buried foundations, old utilities, potential contamination | High water tables, rock ledges, agricultural drainage |
| Utility Connection | $2,000-$5,000 (existing infrastructure) | $15,000-$50,000 (new septic, well drilling) |
| Soil Preparation | $10,000-$25,000 (removal of fill, debris) | $5,000-$15,000 (standard grading) |
| Typical Foundation Type | Deep foundations often required | Standard slab may suffice |
The Water Table Trap That Floods Basements Every Spring
Among the most insidious geotechnical issues is a high seasonal water table. A plot that appears perfectly dry and stable in late summer can become a saturated swamp in early spring after the snow melts or during a rainy season. A high water table means that the ground is saturated with water close to the surface. Building on such a site without proper mitigation is a recipe for disaster. The hydrostatic pressure from the surrounding saturated soil can exert immense force on basement walls, leading to leaks, cracks, and chronic flooding. This not only makes a basement unusable but can also compromise the structural integrity of the entire house over time.
Identifying this risk requires a “landscape forensics” approach. The most reliable indicator is to visit the plot during its wettest season or immediately after several days of heavy rain. Look for standing water, soggy areas that “squish” underfoot, or the presence of water-loving plants like cattails, willows, and rushes. These are nature’s signs of a high water table. Another clue is to observe neighboring properties. Do they have sump pump discharge pipes running constantly? Do homes in a region where basements are common mysteriously lack them on this specific street? These are red flags. The texture of the soil itself can also tell a story, as water seepage leaves distinct marks.
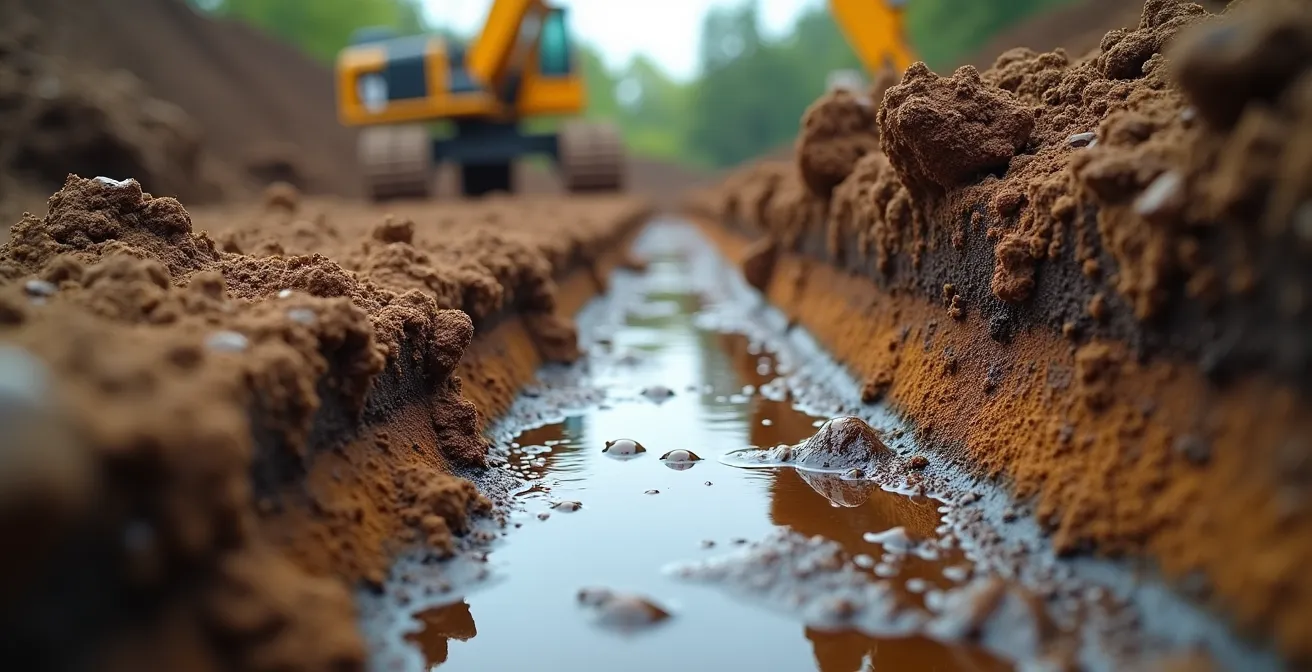
If a high water table is suspected, mitigation is non-negotiable and costly. It involves installing extensive drainage systems, such as French drains and sump pumps, and applying heavy-duty waterproofing to the foundation. According to industry cost data, these necessary drainage systems can cost from $1,100 to $6,500, a significant unbudgeted expense for an unprepared buyer. In severe cases, the best solution may be to abandon plans for a basement altogether, opting for a slab-on-grade or crawl space foundation instead.
Sequencing Your Site Plan: Where to Place the House for Passive Solar?
Once you’ve assessed the fundamental risks of soil, slope, and water, the next stage of geotechnical investigation involves synthesis: how do you integrate your building plans with the land’s inherent characteristics? A key consideration for many self-builders is passive solar design, which uses a home’s orientation and features to maximize solar heat gain in winter and minimize it in summer. The ideal orientation typically involves placing the long axis of the house running east-west, with large windows facing south. However, this ideal can directly conflict with a plot’s geotechnical realities.
What if the ideal solar orientation places the house on the most unstable part of a slope? Or directly over an area with high clay content? This is where a land surveyor’s mindset is crucial. You must prioritize. Foundation stability always trumps optimal solar orientation. A perfectly oriented house with a cracked foundation is a failure. The goal is to find a compromise that respects the land’s load-bearing capacity while still capturing some solar benefits. This might mean shifting the house’s position, altering its footprint, or using creative architectural solutions to achieve your energy goals.
This challenge is not new in construction. The key is balancing architectural ambition with geotechnical prudence. Creative design can often find a way to work with, not against, the land’s constraints.
Case Study: Balancing Solar Orientation with Slope Stability
The Leaning Tower of Pisa serves as an extreme historical example of prioritizing architectural vision over geotechnical reality. Modern projects must balance passive solar benefits with foundation stability. A residential development in California successfully resolved this by using tiered construction on stable northern slopes while incorporating clerestory windows and light wells to capture southern exposure, proving that creative design can overcome site orientation challenges without compromising structural integrity.
For a self-builder, this means your site plan must be a fluid document, ready to adapt to the subsurface narrative revealed during your investigation. The final placement of your home should be a deliberate decision based on a hierarchy of needs, with a safe, stable, and dry foundation as the non-negotiable base.
Why You Can’t Build Within 10 Feet of Your Property Line?
Zoning laws often mandate building setbacks—minimum distances your home must be from property lines, roads, and other features. While many buyers view these as mere bureaucratic hurdles related to privacy or aesthetics, from a geotechnical perspective, setbacks are a critical safety buffer. Excavating for a foundation, especially a deep one for a basement, is a major earthmoving operation. It requires a significant amount of working room for heavy machinery to operate safely and efficiently.
Attempting to excavate too close to a property line is not only impractical but also dangerous. The process destabilizes the soil, and the “angle of repose”—the steepest angle at which a slope of soil remains stable—must be respected to prevent trench collapse. Specialized equipment is often required for tight-space excavation, and operating it demands precision and expertise. The costs for such work can be significant, with rates for specialized excavation equipment running from $100 to $300 per hour. These costs add up quickly when access is restricted.
More importantly, there is a fundamental legal and geotechnical principle at play: the “Right of Lateral Support.” This means you are legally responsible for supporting your neighbor’s land. When you dig a large hole for your foundation, you remove the soil that was naturally supporting their property. If your excavation causes their land to subside, or worse, causes cracks to appear in their foundation, you are liable for the damages. Setbacks provide a physical margin of safety that helps prevent this scenario, ensuring your construction activities don’t create a structural liability for your neighbors.
Vertical Wind Turbines vs. Roof Solar: Which Works in Urban Settings?
As self-builders increasingly look to integrate renewable energy, the choice between technologies like rooftop solar panels and vertical axis wind turbines (VAWTs) often comes down to more than just energy output. In dense urban settings, geotechnical factors play a surprisingly decisive role. While both options contribute to a home’s sustainability, their impact on a building’s foundation and the land it sits on are vastly different. An urban infill lot, with its potentially complex subsurface, makes this a critical consideration.
Rooftop solar panels are largely a structural concern. The primary task is ensuring the existing roof structure can handle the additional dead load of the panels. From a geotechnical standpoint, their impact is minimal, as the load is distributed across the home’s existing foundation. This makes them a relatively straightforward addition to most urban homes, assuming the roof is sound. They integrate with the structure, rather than interacting with the ground itself.
Vertical wind turbines, however, are a different story entirely. Even smaller, residential-scale turbines are subject to significant wind loads and generate constant vibrations. To counteract these forces and prevent overturning, they require massive, specialized concrete foundations. This involves deep excavation, extensive geotechnical analysis to determine soil bearing capacity, and a significant volume of concrete—all of which are complex and expensive undertakings on a compact urban lot. The process mirrors the challenges of building a new foundation from scratch.
Case Study: Urban Renewable Energy Foundation Challenges
Urban renewable energy projects face unique geotechnical challenges. A comparative study of installations revealed that roof-mounted solar systems typically require minimal foundation work beyond structural load verification. In contrast, ground-mounted wind turbines demanded extensive geotechnical analysis, deep concrete foundations resistant to overturning moments, and costly trenching through potentially contaminated urban soils for electrical connections. The study concluded that in dense urban settings, rooftop solar offers superior feasibility from a geotechnical perspective.
Key Takeaways
- The hidden geology of a plot, especially the presence of expansive clay or rock, is the single largest variable affecting your foundation budget.
- Water is the most dynamic risk; a high seasonal water table can compromise a foundation’s integrity and render a basement unusable if not properly mitigated.
- Legal and physical constraints like zoning setbacks are not just bureaucratic lines on a map; they are critical safety buffers with significant geotechnical implications.
How to Legally Navigate Zoning Laws for Your Home Extension Project?
Navigating zoning laws is the final, and often most complex, layer of a site investigation. While the focus of this guide is on purchasing a new plot, these principles are equally critical for a home extension project. You might have what seems like the perfect spot in your backyard, but local ordinances and, crucially, hidden geotechnical factors can put a stop to your plans. Zoning maps often include “Critical Area Overlays” that designate zones with known geological hazards, such as steep slopes, erosion risks, or liquefaction-prone soils near fault lines.
If your property falls within one of these overlays, the standard building permit process is replaced by a much more stringent, lengthy, and expensive geological hazard review. A preliminary geotechnical report becomes not just advisable, but mandatory. The findings of this report will dictate whether your project can proceed at all, and if so, what costly mitigation measures will be required. These can include advanced foundation engineering, extensive retaining walls, or specialized drainage systems, with associated engineering plans adding thousands to your budget.
This is where the power of a “bad” geotech report becomes evident. It can completely derail a project or force a radical redesign. As one leading firm notes, the intersection of geology and bureaucracy can be a project’s biggest hurdle.
A bad geotech report identifying unstable soils, a liquefaction zone, or proximity to a fault line can move a project out of standard zoning review into a much more stringent geological hazard review process, adding months and thousands in engineering fees.
– Capital Geotechnical, Geotechnical Failures Case Studies
Before planning any extension, your first step should be to consult your local zoning map for any overlays. If any are present, commissioning a preliminary geotechnical assessment is a wise investment. A favorable report can be used as leverage in variance applications, while an unfavorable one, though disappointing, saves you from sinking significant funds into a project that is legally or geotechnically unviable.
Ultimately, a successful self-build project is a partnership between your vision and the land’s reality. By adopting an investigative approach and learning to decode the geotechnical DNA of a plot, you can make an informed decision that ensures your dream home is built on a foundation of stability, safety, and financial predictability. The next logical step is to formalize your findings with a professional geotechnical engineer.
Frequently Asked Questions About Geotechnical Issues and Land
Why do setbacks exist beyond just privacy concerns?
Setbacks provide critical working room for excavation equipment and ensure that foundation drainage systems don’t destabilize neighboring properties or cause water runoff issues.
What is the ‘Right of Lateral Support’ principle?
This legal concept means that excavating for your foundation removes support from neighboring land. If their property subsides or foundations crack as a result, you are liable for damages.
Can geotechnical needs override zoning setbacks?
Yes, if a geotechnical report requires wide sloped excavation for safety that crosses setback lines, you may need to apply for a variance, adding time and complexity to your project.